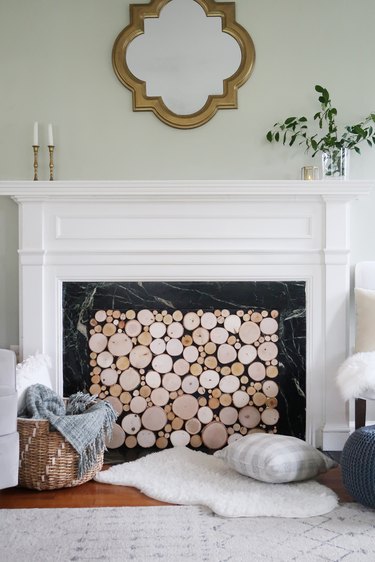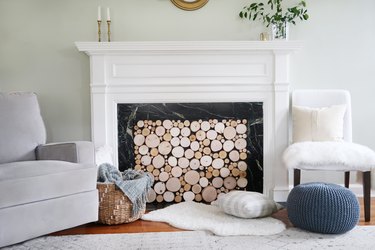
How to keep cold drafts and unwanted critters from entering your home through your fireplace? With this design-worthy fireplace cover. It gives the illusion of perfectly stacked birch logs while adding a layer of warmth and coziness. Get ready for this chic DIY to become the new focal point of your room.
Video: DIY Fireplace Log Cover
Video of the Day
Things You'll Need
Tape measure
Plywood sheet (see Step one for measurements)
2x4 (see Step one for measurements)
Wood screws
Power drill
Matte black paint
Paintbrush
Log slices, varying sizes
Wood glue
Shelf brackets
Circular saw (optional)
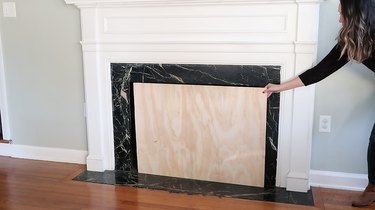
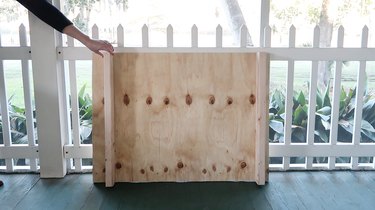
1. Measure and cut the wood
Measure the height and width of your fireplace opening and ask your hardware store to cut a sheet of plywood to the exact dimensions. Also have them cut two pieces from a 2x4 to the same height as your fireplace opening.
Tip
When you get home, check that the plywood fits inside your fireplace opening before proceeding. You may need to sand it down in a few places if it's too snug to slide in and out of the opening.
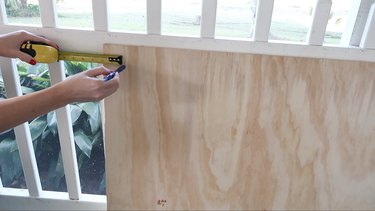
2. Mark the plywood
Measure 2 inches in from the side of the plywood and mark the point.
3. Attach the 2x4s to the plywood
Vertically position one of the 2x4s just inside the 2-inch mark and attach it to the plywood using a power drill and screws. Similarly, attach the second 2x4 2 inches in from the other side. The 2x4s will act as "legs" to keep the plywood upright.
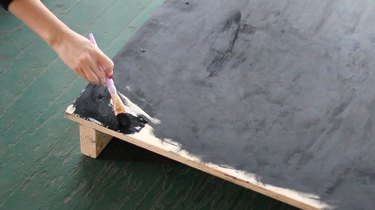
4. Paint the plywood
Paint the front of the plywood with a matte black paint and let dry.
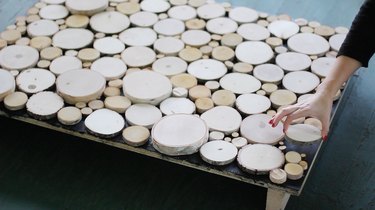
5. Arrange the log slices
Arrange varying sizes of log slices on the plywood until you have your desired pattern. Step back a few times as you arrange the slices to make sure it looks like a realistic stack of logs, with each one resting on the one below it.

Tip
This tutorial features purchased pre-cut wood slices from the craft store, but you'll save some money if you have a circular saw and cut your own slices from branches and logs found outside.
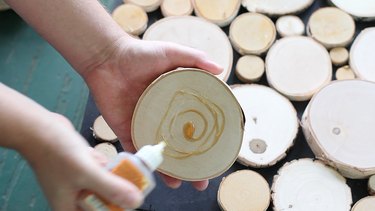
6. Glue the log slices to the plywood
Once you're satisfied with the arrangement of the log slices, glue each one into place with wood glue. Keep in mind that wood glue expands as it cures, so don't put any glue near the edges, or you'll risk having it ooze out of the sides of the logs. Leave the plywood laying flat on the floor, allowing the glue to dry overnight.
Tip
Don't use hot glue when adding the log slices to the plywood — it won't hold! Wood glue works best.
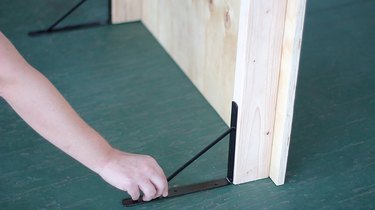
7. Attach the shelf brackets
Attach a shelf bracket to the bottom of each 2x4 "leg" to add additional support to the fireplace cover, so it doesn't tip over once it's upright inside your fireplace.
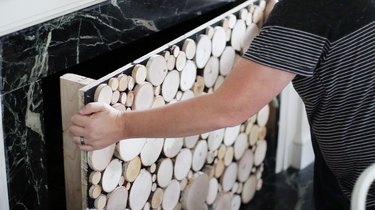
8. Place the cover into your fireplace
Gently slide the fireplace cover into the opening in your fireplace. You may need to wiggle and nudge it a bit to get it in there snugly. Any time you want to use your fireplace, simply pull the cover out of the opening and slide it to the side.
Tip
You could staple or glue black ribbon in a few discreet spots along the bottom or sides of the fireplace cover that act as pull tabs to make it easier to pull the cover out when you'd like to use your fireplace.
Stand back and marvel at how realistic the stack of "logs" look, and how much style it instantly adds to your fireplace vignette!