Every great party deserves a sensational charcuterie board, and a Halloween party gives you an opportunity to get extra creative. Amaze your guests with this stunning and spooky skeleton party platter serving up delicious treats inside a festive plastic skeleton laid out on a charcuterie board!
It's as easy as gathering Halloween foods, like candy, cookies, caramel corn, and anything else you'd like, and placing them strategically inside and outside the skeleton on the board. Our skeleton charcuterie board features an abundant platter of desserts, but you could just as easily swap in savory appetizer items, like cheese, instead.
Video of the Day
Things You'll Need
Medium posable plastic skeleton
Large serving platter or board
Assorted candies, cookies, desserts, etc.
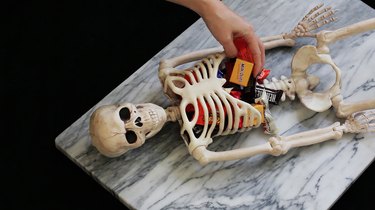
1. Position the skeleton
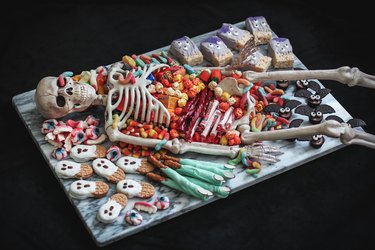
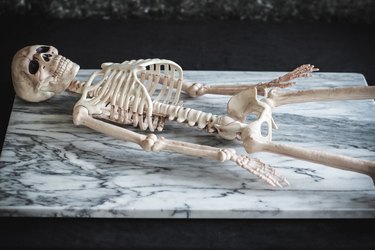
Place the serving tray or board on the table where you plan to serve it and place the skeleton on top of it. Position the skeleton so that the torso is in the center of the platter.
Tip
Before assembling your platter, be sure to thoroughly wash and dry the plastic skeleton using soap and water since you'll be serving food on it.
2. Fill the rib cage
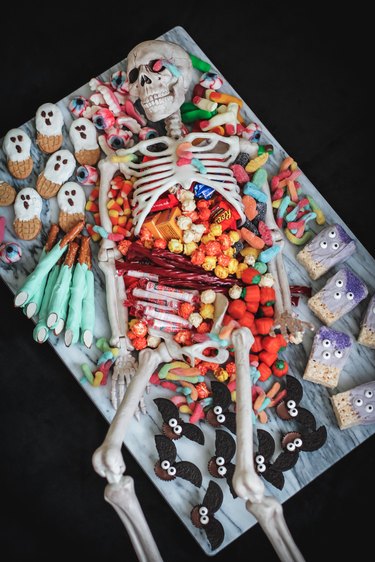
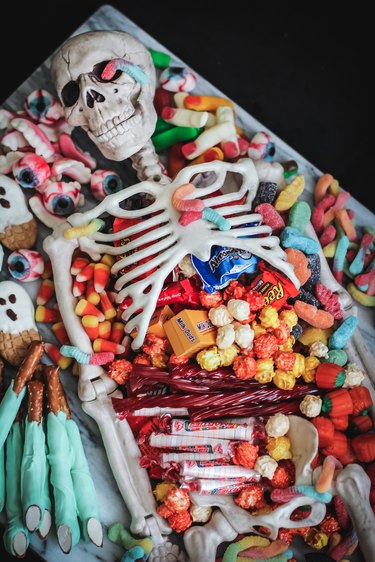
Fill the rib cage of the skeleton with candy, letting some of it spill out of the sides.
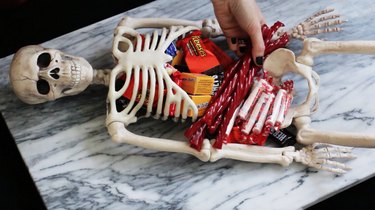
3. Place candy on the torso
Pile more candy on top of the torso area, making sure to use a variety of different candy types. We used assorted fun-size candy bars, Smarties, and red licorice.
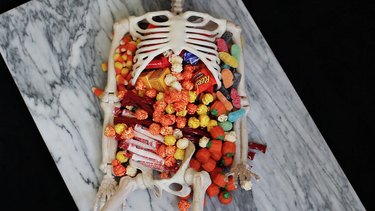
4. Fill the crevices
Fill the crevices between the arm bones and torso with different types of candy. Be sure to vary the colors and textures of the candy for a more visually appealing platter and pile it high so that it appears to overflow out of the skeleton. We're going for abundance here!
Tip
Try using candy corn, sour gummies, candy pumpkins, and caramel corn for a varied display.
5. Fill the platter with larger treats
Place larger Halloween treats around the edge of the platter to fill in the areas around the skeleton. The more festive the treats, the better!
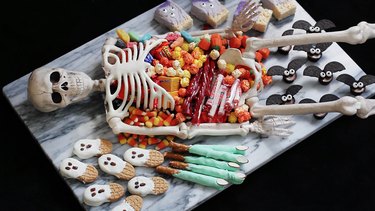
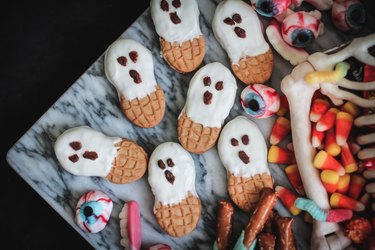
For the ghosts, we simply dipped Nutter Butter cookies into white candy melts and drew eyes and mouths on them with melted chocolate.
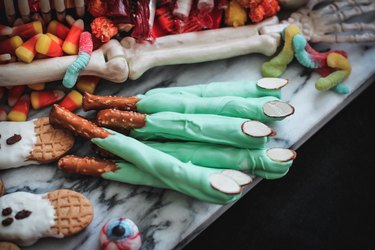
For the witch's fingers, we dipped pretzel rods into green candy melts and added a sliced almond "fingernail" at the tip.
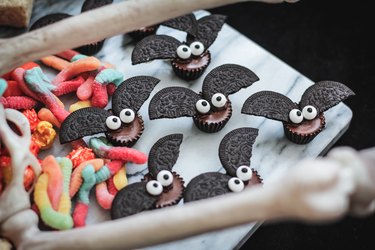
For the bats, we took apart Oreo Thins, broke the wafers in half, and used melted chocolate to secure two "wings" to each Reese's Peanut Butter Cup. We then secured googly eyes to the center with melted chocolate.
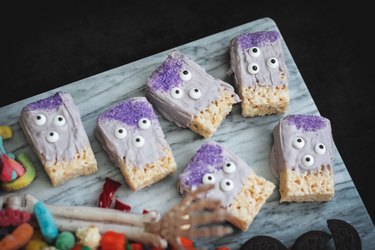
For the three-eyed monsters, we dipped Rice Krispies Treats into purple candy melts, added three googly eyes to each, and dusted the tops with purple sugar to create "hair."
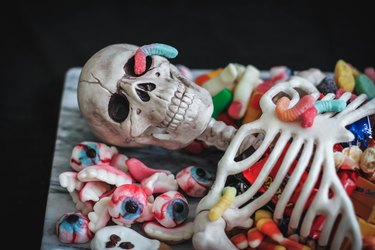
6. Garnish the platter
For a spooktacular touch, garnish the platter with an assortment of creepy candy. We filled in any remaining empty spots with gummy eyeballs, bloody fingers, vampire fangs, and a few strategically placed gummy worms.
This easy skeleton dessert platter is bound to bewitch all of the guests at your Halloween party!