Get ready for a fun and creative outdoor adventure! In this kid-friendly guide, we'll show you how to make your very own weaving using a simple loom made from sticks you can find right in your backyard or local park. This hands-on project is perfect for young artists and nature lovers alike, combining the joy of crafting with the thrill of exploring the great outdoors. Let's gather some sticks, unleash our creativity, and create beautiful weavings together!
Video: Weaving on a Stick Loom
Video of the Day
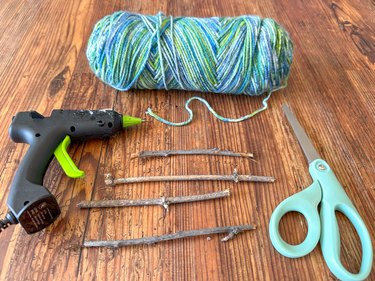
Things You'll Need
4 sticks
Glue gun
Yarn
Sharp scissors
Fork
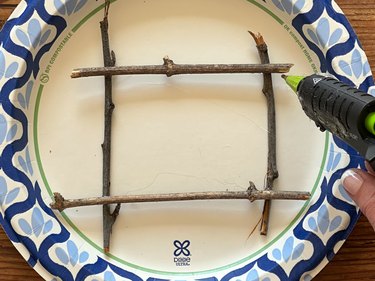
1. Create the stick loom
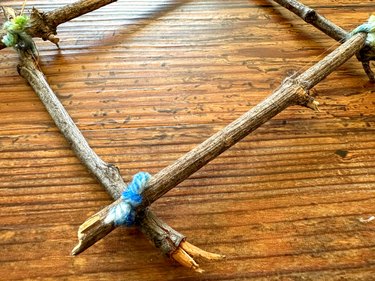
To create a simple weaving loom, start by gathering four sturdy sticks of similar length. Arrange them into a square shape, ensuring the ends overlap at the corners. Using a hot glue gun, carefully apply a generous amount of glue to each overlapping corner, pressing the sticks together firmly until the glue sets.
For added stability, wrap a piece of yarn tightly around each corner multiple times, tying it off securely. This not only reinforces the glued joints but also adds a touch of rustic charm to your homemade loom. Once the frame is sturdy and the glue has dried completely, your loom is ready for weaving!
2. Wrap the warp threads on the stick loom
In weaving, you have two main types of threads that work together to create your fabric: warp and weft threads. Think of the warp threads as the sturdy "skeleton" of your weaving. These are the threads that you stretch tightly up and down on your loom. They stay in place and give your weaving its shape and strength.
Take one end of the yarn and tie a knot around the top corner of your loom. Make sure it's nice and tight so it won't come undone.
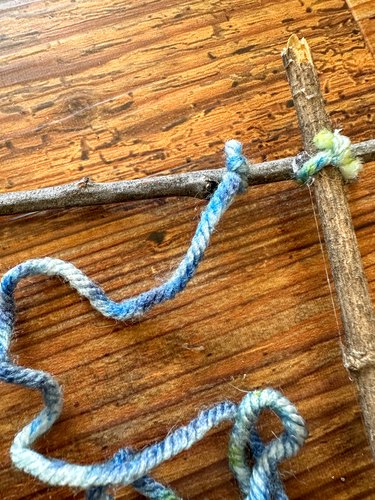
Pull the yarn straight down to the bottom corner of the loom. Wrap the yarn around the bottom stick twice, bring the yarn back up to the top stick moving a little bit to the side, and wrap it around the top stick twice again. Continue this pattern — wrapping the yarn around the top stick twice and then down to the bottom stick, wrapping it twice — moving a little to the side each time. Keep going until you've filled the whole loom with warp threads. When the loom is full, tie the yarn in a knot around the stick to secure it. If you have extra yarn, cut it off with scissors.
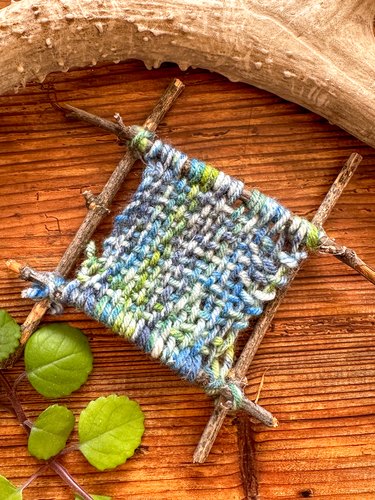
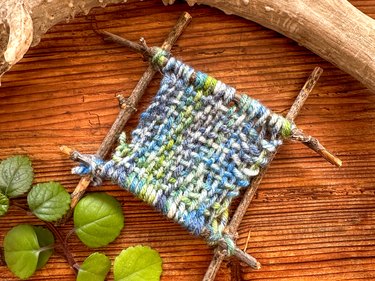
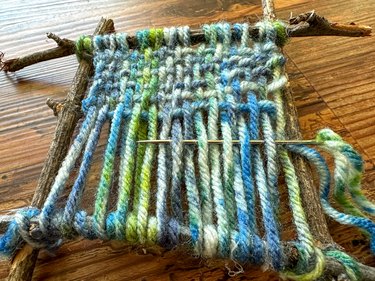
3. Weave the weft threads
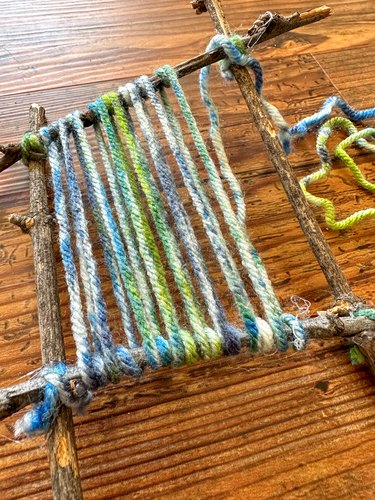
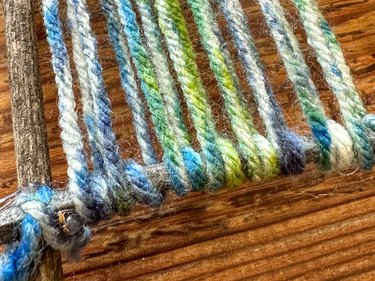
The weft threads are like the fun "filling" that goes over and under the warp threads. You weave the weft threads through the warp threads from side to side. By going over one warp thread and under the next, you create a beautiful pattern. Together, the warp and weft threads make a strong and colorful piece of woven fabric!
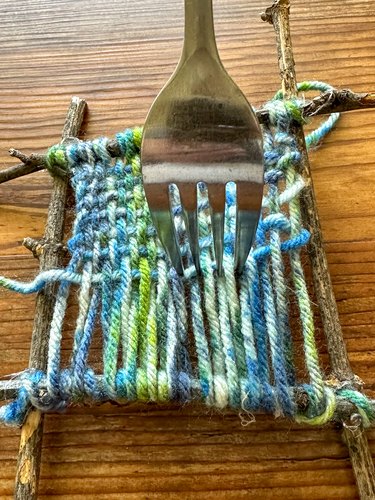
4. Push the threads together
A weaving comb is a super helpful tool that helps make your weaving look neat and tidy. When you're weaving, you use the comb to push down the weft threads (the ones that go side to side) after you've woven them through the warp threads (the ones that go up and down).
There's no need to buy a special weaving comb for your weaving; simply use a fork from your silverware drawer to push the weft threads tight.
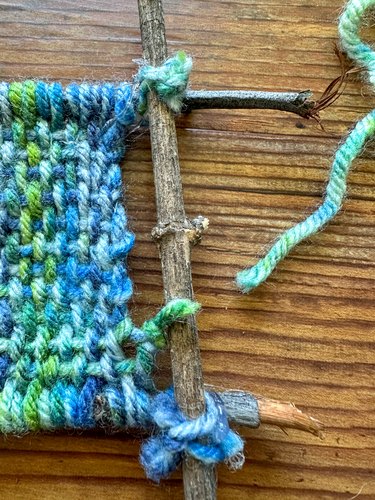
5. Finish the weaving
When you get to the end of the row and you're ready to stop weaving, leave a little bit of extra weft thread (the one going side to side) hanging off the edge. Tie a small knot by looping the end of the weft yarn around a nearby warp thread and pulling it tight. Then, cut the end off the yarn.
This is a perfect project for summer vacation. It's fun and creative and lets you spend time exploring nature while gathering your materials. With your new skills, you can create all sorts of colorful and unique designs. Remember that practice makes perfect, so keep weaving and experimenting with different colors and patterns. Most importantly, have fun and be proud of the unique art you've created with your own hands. Happy weaving!