Things You'll Need
Particulate-filtering mask
Safety goggles
70 feet perforated galvanized steel tubing
Tape measure
Metal saw
Drill
Vice grips, 3/8-inch and 9/16 inch
Wrenches, 3/8-inch and 9/16 inch
65 grade 5 bolts, 3/8-inch diameter
2 grade 8 bolts
65 locknuts, 3/8-inch diameter
150 washers, 3/8-inch diameter
3/4-inch plywood
Circular saw
Wood glue
Female rod ends
2-inch exterior screws
Scissors
2 yards waterproof canvas fabric
2 yards mildew-resistant stuffing, 2 inches thick
Staple gun
BMX bike wheels
Bolt cutters
Blink lights, optional
Non-slip tape, optional
Slow-moving vehicle sign, optional
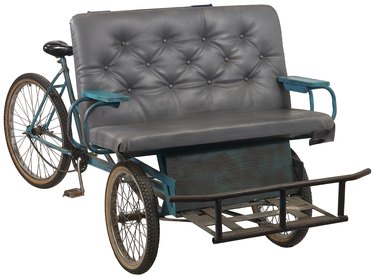
Building a rickshaw promotes green travel, provides an opportunity for exercise and may even lead to a business opportunity for residents of communities with frequented destinations, such as New York's Central Park or San Antonio's Riverwalk district. Rickshaws do not suffer the afflictions of smell and animal temperament that horse-drawn carriages do, but they can create the same romantic environment for traveling couples.
Metal Frame
Step 1
Cut the perforated galvanized steel tubing with a hacksaw. Cut it into two 3-foot sections, two 4-foot pieces, three 2-foot sections, five 18-inch pieces, four 1-foot sections and three 6-inch lengths.
Video of the Day
Step 2
Assemble the base frame by placing the 4-foot sections parallel to each other and lining up two 3-foot sections to form a rectangle. Place the 3-foot lengths on top of the 4-foot pieces and move toward the center of the rectangle approximately 1 foot. Bolt the four pieces together through the holes in the tubing.
Step 3
Bolt the 2-foot sections against opposite corners along one long edge of the base frame to create the back frame. Reinforce the top by bolting a 3-foot piece to the vertical posts.
Step 4
Bolt a 3-foot section to the underside of the 3-foot long sides of the base frame to support the rear seat. The section should be about 6 inches in from the back frame. Bolt a 1-foot post vertically in each corner where the 3-foot pieces meet to hold the back of the seat.
Step 5
Bolt two 1-foot sections to the top of the vertical seat posts and the middle of the vertical back frame posts to reinforce the seat back.
Seat
Step 1
Measure the dimensions of the rectangle formed from the 3-foot wide ends of the base frame and the distance between the 3-foot piece attached to the base frame and the 4-foot base frame length opposite the back frame. Mark and cut a section of plywood to these dimensions. Cut square notches in the corners of one long side so the plywood slides in against the vertical seat posts. Secure to the frame with screws.
Step 2
Measure the length and width from the front of the plywood rickshaw floor to the top of the vertical seat post. Cut two rectangles to these dimensions and attach to the floor and posts using wood glue and screws.
Step 3
Measure the distance from the top of the vertical seat posts to the crosspiece on top of the backframe and cut two plywood rectangles to those dimensions.
Step 4
Cut stuffing to match rectangle dimensions determined in the previous step. Add 2 inches to the length and width measurements and cut canvas fabric to those dimensions.
Step 5
Lay the fabric right side down and center the stuffing on it. Place the plywood directly on the stuffing and fold the excess fabric over. Staple the excess fabric to the underside of the seat. Repeat for the backrest and bolt both pieces to the steel tubing frame.
Making it Mobile
Step 1
Locate the center of the front side of the base frame. Place an 18-inch tubing section vertically on the base frame surrounded by two 6-inch tubing pieces. Bolt the vertical post to the 6-inch pieces and bolt the 6-inch pieces to the base frame.
Step 2
Mount the remaining 6-inch tubing section on the bike under the seat. Connect the remaining 2-foot piece to the rickshaw and bike using female rod ends.
Step 3
Attach the BMX bike wheels to the 3-foot base frame sides, just forward of the back frame. Slide the two remaining 3-foot sections onto the exposed wheel axle and bolt the tubing to the end of the 4-foot long frame sides to hold the wheels in place.
Step 4
Cut off all protruding screw and bolt ends with bolt cutters. Attach non-slip tape to the rickshaw floor, as well as blink lights and a slow-moving sign to the back frame if you intend to use the rickshaw in a business venture.
Tip
Contact your local Department of Transportation Office to obtain information about restrictions and permits if you plan to begin a rickshaw transportation business.
Warning
Wear your goggles and mask while cutting the steel tubing to avoid injury from sparks or inhalation of harmful fumes.
Always use washers when attaching bolts and screws to the frame to prevent slipping.
Video of the Day