Things You'll Need
Two pair of slip-joint pliers
Propane torch
Safety goggles
Heavy work gloves
Bucket
Rag
Wire brush
Emery paper
Silver solder
Copper pipes and fittings are used throughout the plumbing systems that exist in many homes and commercial buildings. Copper is durable and does not rust like steel or iron and can handle high heat unlike plastic plumbing. Copper pipes are usually connected together using a variety of fittings, including elbows, T's and couplings. You can remove copper fittings and reuse them by following a straightforward procedure that requires a moderate amount of time and effort.
Step 1
Turn off the water supply and drain the pipes by opening a faucet on the lowest and highest level of the home.
Video of the Day
Step 2
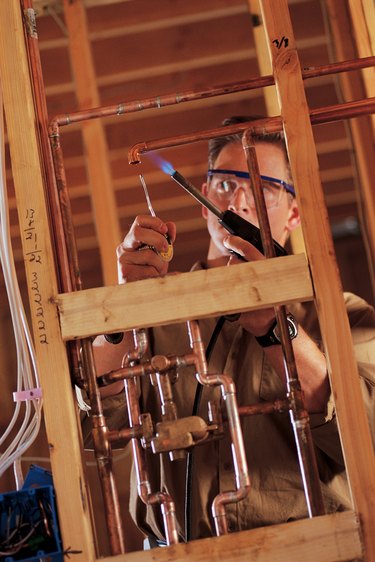
Fill a bucket with cool water and place it in the work area. The bucket will serve to cool the fitting once it is removed and be a source of water to extinguish any material that may accidentally ignite. Add a rag to the bucket. Wear safety goggles to protect your eyes and heavy work gloves to protect your hands. Ignite a propane torch and adjust the flame until the tip is a bluish color.
Step 3
Hold the propane torch on the fitting for 45 seconds to a minute. Hold the torch directly on one of the solder joints until the solder begins to melt. Turn off the torch.
Step 4
Use one pair of slip-joint pliers to hold the fitting steady and another pair to detach the pipe from the fitting. You may have to twist and pull a bit, but the two pieces should eventually disengage from each other. Heat the joint again with the propane torch if you have trouble removing the parts. Repeat the procedure for other solder joints on the fitting. Place the fitting in a bucket of cool water once it is completely detached.
Step 5
Clean the fitting thoroughly using a wire brush to remove larger chunks of solder and use emery paper to remove dirt and grease. Sand the pipe where the fitting is being reused with emery paper to prepare it.
Step 6
Install the fitting onto the new pipe and heat the joint with a propane torch for 45 seconds to a minute. Touch the tip of the silver solder to the joint and let it melt around the circumference of the joint. Spread the solder completely around the entire joint using the tip of the solder. Throw a damp rag over the soldered joint to cool it quickly. Repeat the procedure for other joints on the fitting.
Step 7
Restore the water supply and check the fitting for leaks. If there are drips, take note of where it is dripping and turn off the water, drain the system and re-solder the fitting.
Video of the Day