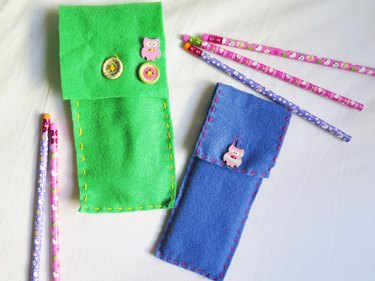
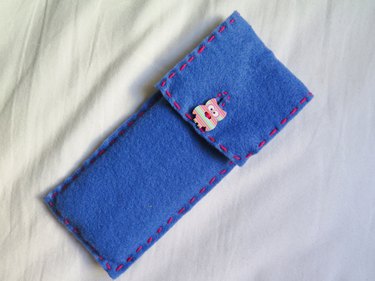
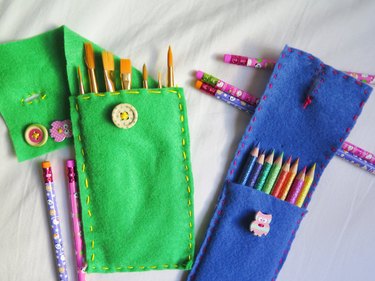
Elevate your school supplies by creating a pencil case made of felt, embroidery, and cute button closures. No experience with sewing? No problem! This simple DIY is tailor-made for beginners of all ages. It's a sweet way to carry pencils, pens, and other writing tools when heading back to school.
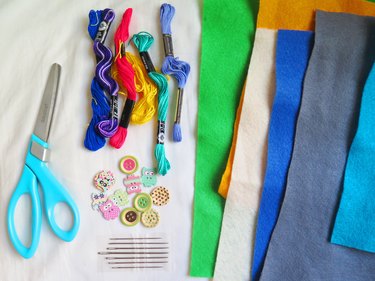
Things You'll Need
8-in. by 11-in. felt, any color
Pen or fabric chalk
Fabric scissors or regular shears
Embroidery thread, any color
Embroidery needle or large eye needle
1/2- to 1-in. wide button, any color or design
Video of the Day
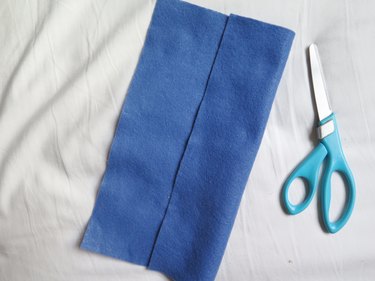
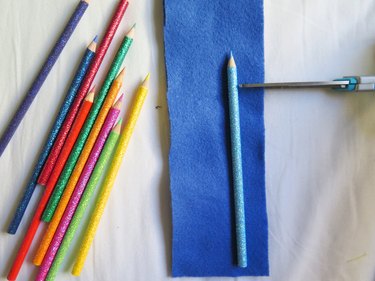
1. Cut the felt
On a flat surface lay the felt vertically, as if it were a piece of paper. Measure and fold one side of the felt inward by 2 1/2 inches.
Video of the Day
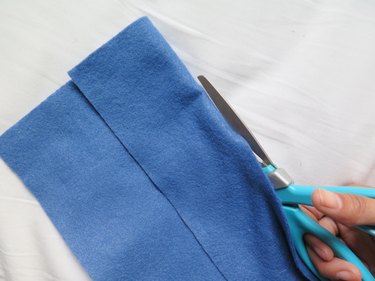
Cut along the fold -- and then keep the cut felt where it is and use the inside edge as a guide to cut another piece of felt the same size.
You now have the two sides to your pencil case.
If you want your pencils or writing tools to be exposed when you open the flap of your case, then place a pencil on top of one piece of felt. With a pen or fabric chalk, mark and cut the felt.
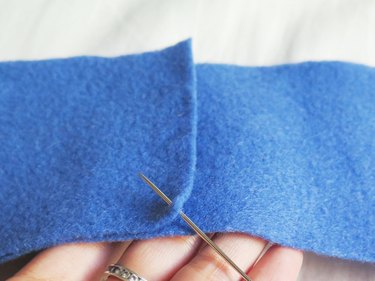
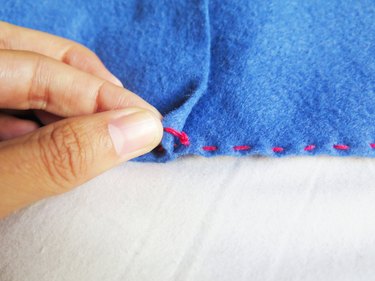
2. Sew the sides of the felt together
Thread the needle with embroidery thread and start a straight or running stitch on either corner where the two pieces of felt meet at the opening of the case.
Tip
A straight or running stitch is just a basic stitch in hand-sewing where you pass the needle in and out of your fabric at a regular distance.
Then, sew a straight or running stitch down the side, across the bottom, and back up the other side of the case.
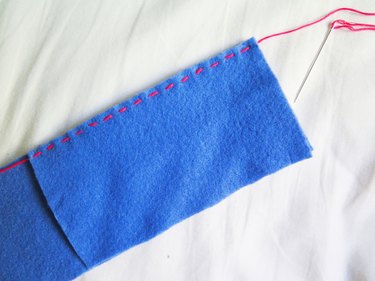
If you do not want to continue sewing a border around the flap, then cut the thread on each side, knot, and trim. If you want the border to continue on the flap, don't cut the thread just yet.
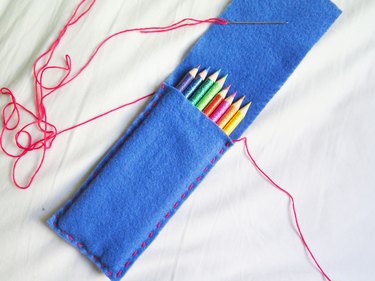

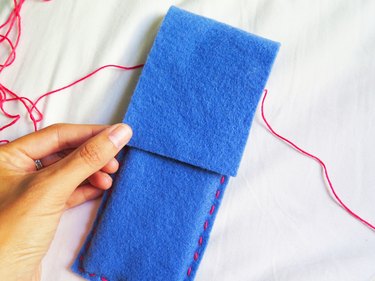
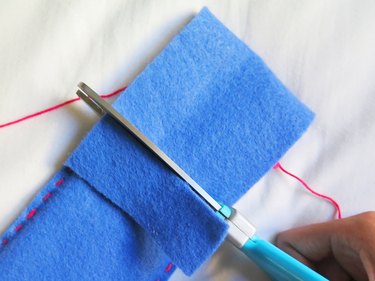
3. Cut the felt flap
Next, place the pencils or writing tools into the case. Close the flap over the pencils and decide whether you would like to make the flap shorter. If so, mark the felt with a pen or fabric chalk, and then cut the case.
Tip
Do not trim the flap past 1 inch from the opening of the case, though, or you won't have enough room to sew on a button and use the flap to close it.
4. Finish sewing the border
If you are continuing the stitch border around the flap, keep sewing the running stitch all around until it meets at the beginning point.
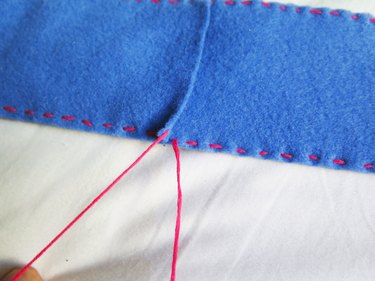
Then cut the ends of the thread, knot, and trim.
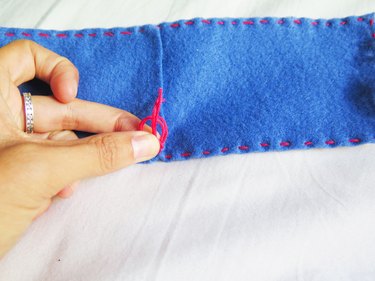
Tuck the knot inside the case.
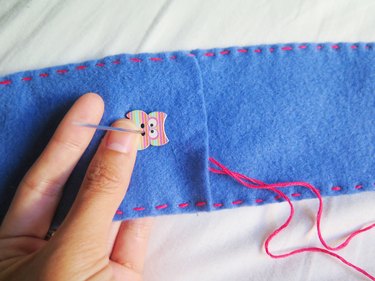
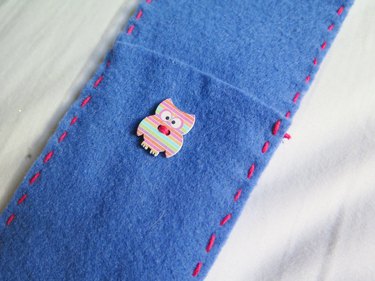
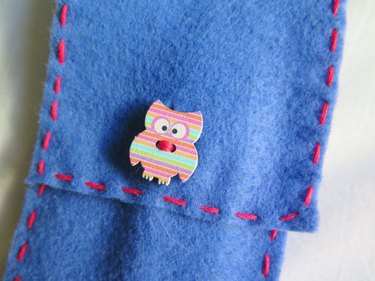
Select a button and sew it onto the front of the pencil case approximately 1/2 inch from the top of button to the opening of the case.
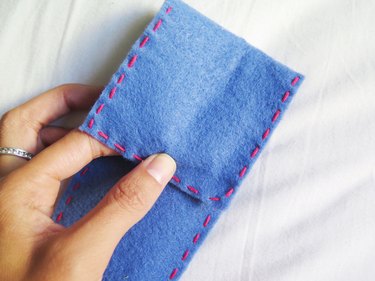
Place a few pencils back into the case and close the flap.

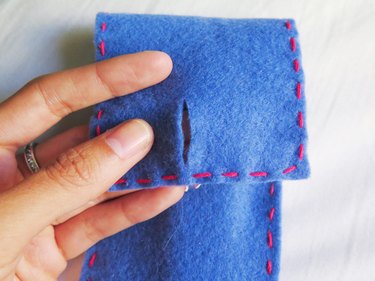
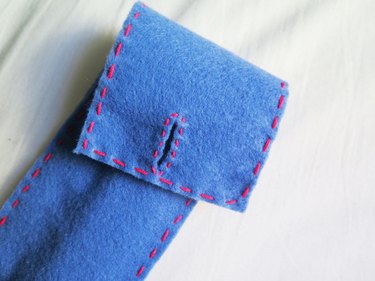
Use your thumb as a guide to figure out where the button is placed underneath the flap. Note where your thumb marked the button -- and then about a 1/2 inch from the edge of the flap, cut a centered, vertical slit, big enough to pull the button through.

Tip
To keep the slit from stretching out over time, use the embroidery thread and needle to sew a running stitch around the opening.
7. Store your pencils
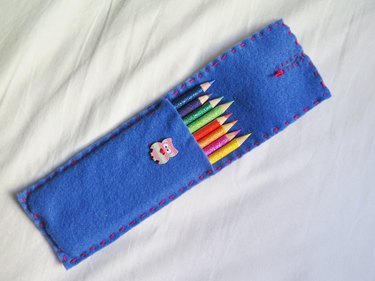
Done! Now you can store your pencils and other writing tools in your fabulous new pencil cases. These make cute back-to-school gifts for kids, teachers, or friends. For extra credit, make them in your school's colors!

Tip
This project is not restricted to making cases just for writing tools but can also be made for notebooks, cell phones, tablets, and other school supplies. Just resize accordingly!