Plenty of scary monsters come to mind when you think of Halloween decorations, but none more so than a witch. Whether they're stirring something sinister in a caldron or plotting and scheming with their pet black cat, spooky witch decor abounds during the Halloween season.
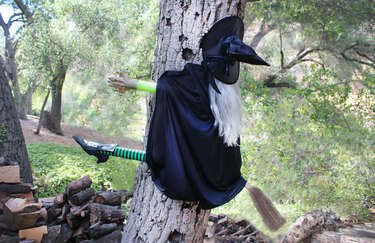
But not all Halloween witches need to be scary! You can inject some humor into this frightful figure and show that some witches just aren't masters of flight. Create a unique piece of Halloween yard decor with our fun tutorial for crafting a witch that has run into a tree!
Video of the Day
Video of the Day
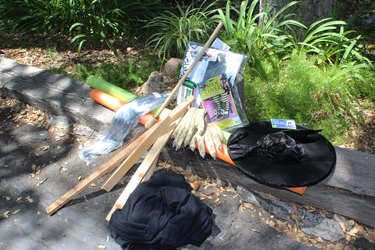
Things You'll Need
2 pool noodles (one of them needs to be green)
1 pine 1x2 board, 8 feet long
Chop saw
Scissors
9 2-in. nails
Hammer
Staple gun
Adult-size cape with hood
Adult-size green monster hands/gloves
Wig
Witch's hat
Striped leggings
Black shoes with heels
Witch shoe covers
Kid-size witch's broom
1. Cut the wood and pool noodles
Cut the wood using a chop saw. Start by cutting two pieces at 16 inches and another two pieces at 22 inches. Then, use scissors to cut the green pool noodle into two 16-inch pieces and the other noodle into two 22-inch pieces. Cut lengthwise down one side of the noodles so you can fit the wood into them.
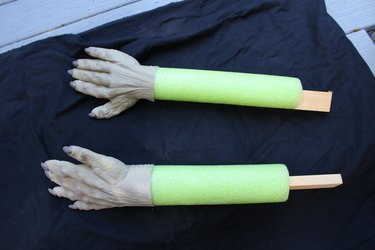
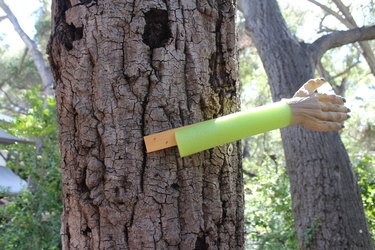
2. Create the arms
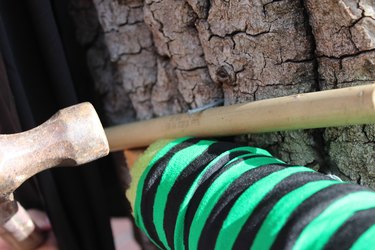
Insert the smaller wood pieces into the smaller green pool noodle pieces, making sure the wood pieces stick out on one end by 2 inches. Place the monster hands on the other ends of the pool noodles. These will be the arms for the witch.
3. Attach the arms to the tree
When attaching the arms to a tree, be sure the thumbs of the monster hands are running parallel with the wooden piece that is exposed and that both thumbs are facing up toward the sky.
Place the first arm where you would like it to go on the tree and hammer two nails into the wood sticking out of it. Hammer the other arm on the other side of the tree, making sure the arms are positioned so the cape can cover about half of each arm.
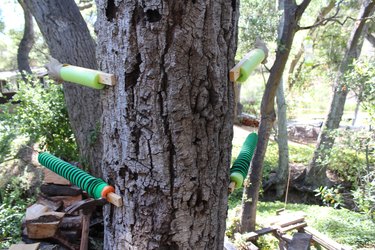
4. Attach the legs to the tree
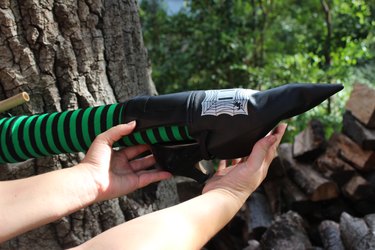
Insert the longer wood pieces into the longer pool noodles, leaving 2 inches of wood sticking out of one end. Put a striped legging on both pool noodles to create the witch's legs.
Attach the legs the same way you did the arms, making sure the cape can cover about one-third of the legs too.
Tip
Since the size of each cape will vary, the best way to determine the proper spacing between the arms and legs is to hold the cape up around the arms and measure about 6 to 8 inches up the tree, starting from the bottom of the cape. Attach the legs to the tree at that point.
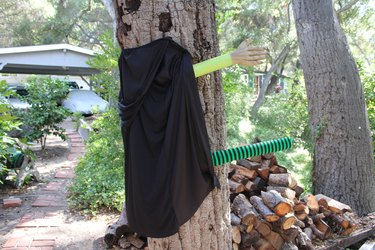
5. Attach the cape to the tree
Place the seam that attaches both the hood and the cape together about 5 inches above the arms. You will need a helper to hold the cape in place while you spread it out to make sure it can cover the arms and legs.
Once positioned, use a staple gun to attach the cape to the tree, stapling five evenly spaced staples along the seam. The hood should cover the staples. Move parts of the cape in place so it's covering the arms and legs and place a staple above the arms and below the legs to keep the cape in place.
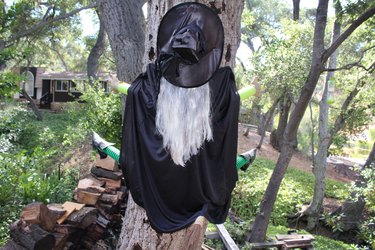
6. Attach the wig and hat to the tree
Place the brow of the wig about 7 inches above the cape. Depending on the length of the wig, you may need to adjust how high it goes. Once it's in a good spot, staple the wig to the tree.
Place the hat over the top of the wig and staple along the outer rim of the hat to attach it to the tree. Ideally, the bottom of the hat should hang over the cape by a couple of inches. You should only need about three staples to attach the hat.
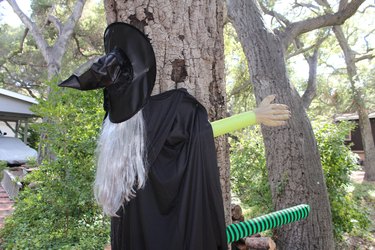
7. Place the broom
The broom will be balanced between the wooden part of one leg and a nail. Place the broom at an angle on top of the wooden part of the leg with the bristles sloping downward and make sure the broom's bristles stick out far enough from underneath the cape. Place a nail directly above the broom to keep it snugly in place.
Tip
This method allows you to use the same broom year after year. Trying to nail or screw the broom handle into the tree may result in the broom breaking or cracking.
8. Put shoes on the legs
Place the black heeled shoes on the end of the legs. Complete the "witch flying into a tree" scenario by placing the witch shoe covers over the shoes to make sure they stay on the pool noodles.
Prepare for your neighbors' reactions to your new Halloween yard decoration and get ready to answer their questions about how they can create their own witch smashing into a tree!