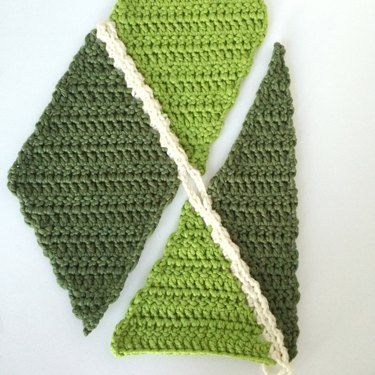
Diamonds add a graphic, fun element to any crocheted piece. Combine crocheted diamonds to make afghans, throw pillows, bunting decorations -- and more.
To crochet a basic diamond shape, you'll need to know how to chain (ch), double crochet (dc), double crochet two together (dc2tog), and single crochet (sc).
Video of the Day
Video of the Day
Things You'll Need
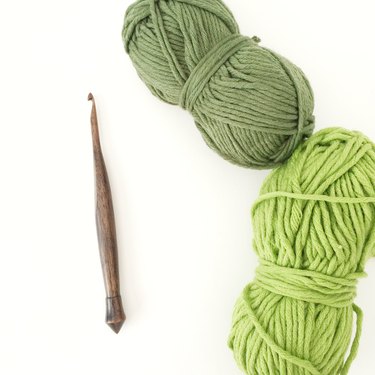
Yarn
Crochet hook -- size appropriate for yarn weight
Diamond Section
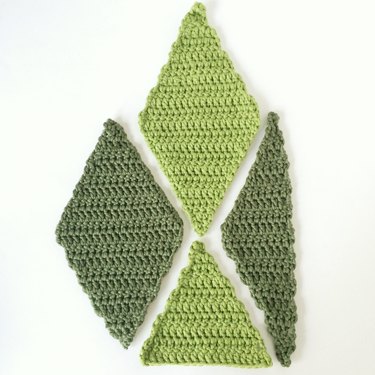
Begin by either drawing the layout or looking at a pattern to know how many of each shape -- the basic diamonds, the triangles and the narrow, elongated triangle-shaped sections that go in between them the diamonds -- you'll need to crochet.
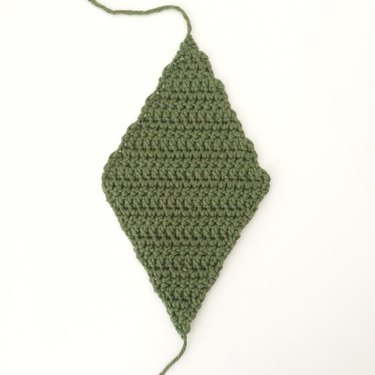
Step 1: Crochet Diamonds
Row 1: Ch 4, dc in 4th ch from hook. Turn.
Row 2: Ch 3, dc in same st as chain, 2 dc in next stitch. Turn (4 sts).
Row 3: Ch 3, dc in same st as chain, dc until 1 stitch remains, 2dc. Turn (6 sts).
Contine in this manner -- increasing on both sides of the triangles until you reach 20 sts total. Your stitch count should increase by two every row.
Row 11: Dc2tog (use ch 2 as first dc for decrease), dc 16, dc2tog. Turn (18 sts).
Continue in this manner -- decreasing by 1 stitch on each side of the diamond using dc2tog. Your rows should decrease by two sts every row. Repeat until you have two sts left.
Row 20: Dc2tog by chaining two and using that as first dc for the decrease.
Fasten off. Your diamond is complete.
Step 2: Crochet Perfect Triangles
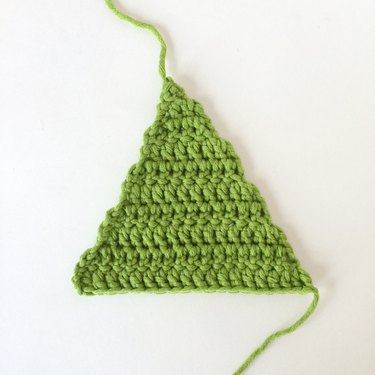
Perfect triangles are exactly half of a diamond. Repeat rows 1 through 10 of Step 1 to get half of a diamond (20 sts).
Step 3: Crochet Long Triangles
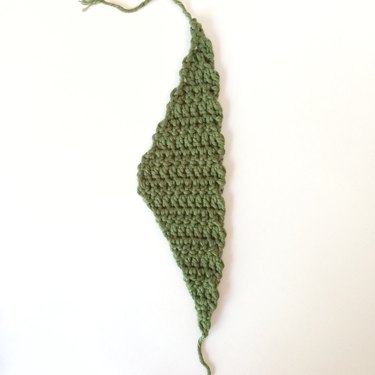
Long triangles are a vertical half of a diamond. One side will remain straight, while the other side will always be the increased or decreased side. This shape is somewhat tricky as it's easy to lose track of which side is the increase, so work carefully.
Row 1: Ch 4, dc in 4th ch from hook. Turn.
Row 2: Ch 3, dc in same st, dc in next. Turn. (3 sts)
Row 3: Ch 3, dc in next st, 2dc in last st. Turn. (4 sts)
Row 4: Ch 3, dc in same st, dc across. Turn. (5 sts)
Row 5: Ch 3, dc in next st, dc until last st, 2 dc. Turn. (6 sts)
Row 6: Ch 3, dc in same st, dc across. Turn. (7 sts)
Row 7: Ch 3, dc in next st, dc until last st, 2dc. Turn. (8 sts)
Row 8: Ch 3, dc in same st, dc across. Turn, (9 sts)
Row 9: Ch 3, dc in next st, dc until last st, 2dc. Turn. (10 sts)
Row 10: Ch 3, dc in same st, dc across. Turn. (11 sts)
Row 11: Ch 3, dc until two sts remaining, dc2tog. Turn. (10 sts)
Row 12: Dc2tog (use ch 2 as first dc for decrease), dc across. Turn. (9 sts)
Row 13: Ch 3, dc until two sts remaining, dc2tog. Turn. (8 sts)
Row 14: Dc2tog (use ch 2 as first dc for decrease), dc across. Turn. (7 sts)
Row 15: Ch 3, dc until two sts remaining, dc2tog. Turn (6 sts)
Row 16: Dc2tog (use ch 2 as first dc for decrease), dc across. Turn. (5 sts)
Row 17: Ch 3, dc until two sts remaining, dc2tog. Turn. (4 sts)
Row 18: Dc2tog (use ch 2 as first dc for decrease), dc across. Turn. (3 sts)
Row 19: Ch 3, dc2tog. Turn. (2 sts)
Row 20: Dc2tog (use ch 2 as first dc for decrease). Fasten off.
Joining the Shapes
A harlequin blanket tutorial by Solstrikke demonstrates how to join these shapes for an afghan. Her tutorial, which is a "join as you go" pattern, works up quickly, and you have few ends to weave in. You can follow her tutorial, or go for something more simple such as a mattress/whip stitch to join your shapes.
Based off her tutorial, you will join the shapes in diagonal lines, first working along the sides of one line, and then coming back around to work back along the other side, which will join the two together.
Step 1: Lay Out the Shapes
Figure out the placement of your shapes.
Step 2: Starting the Diagonal Join
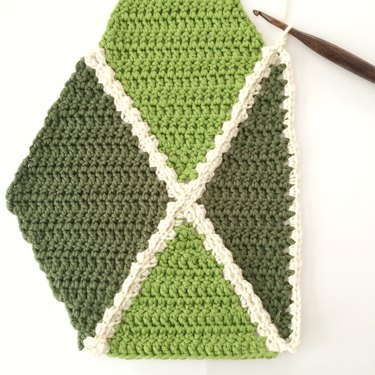
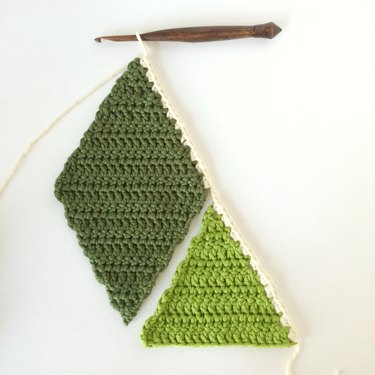
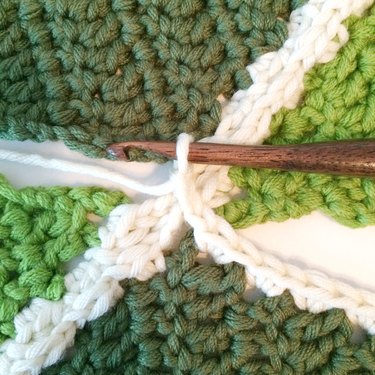
Choose a diagonal line to start joining your shapes, either right slanting or left. Join the yarn to the side of the shape at a corner, and sc 2 for every row up/down the side of the shape. When you reach the end of the side you are working on, ch 3, and join the next shape by sc 2 in every row. See the photo.
Step 3: Turn Back
When you reach the end of an entire diagonal column of shapes, ch 3. Now you will be working back along the same line you just created by joining a new column of shapes. It helps to lay the shapes over each other.
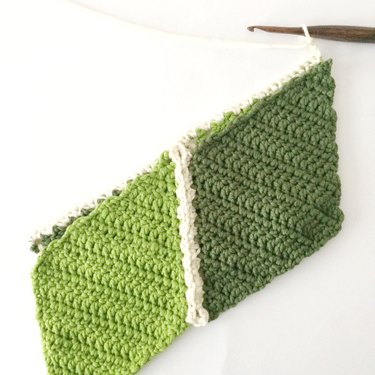
First crochet 2 in the first shape you'll be joining; then 1 st in between groups of two single crochets to join both columns together.
In between shapes, ch 3 and then continue on. It should look like the picture.
Step 4: Continue Around
Continue to 2 sc the spaces round each shape until you reach a point where you can come back along a line. Looking at the above picture, I would now sc along the straight edge of the long triangle, then start a new diagonal line coming down to the left to cross over the one just created.
Step 5: Cross Over
When it's time to cross over, ch 1, ch 1, catching yarn underneath the two perpendicular chain 3s; ch 1 again, and continue on with single crochets.
Keep repeating this method until all of your diamond section has been properly joined.
