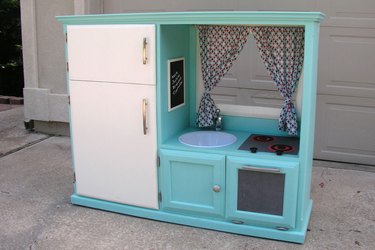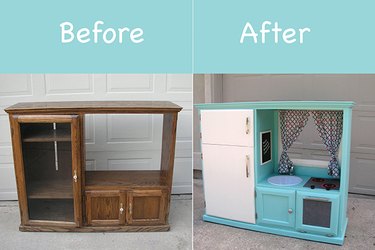
The advent of the rectangular flat-screen TV has rendered those old box-shaped entertainment centers obsolete, and since just about every family had one back in the day, they are in plentiful supply at thrift stores and garage sales across the country. Rescue one from a future in the landfill and give it a whole new life as an adorable play kitchen for kids! Our easy step-by-step tutorial shows you how.
1. Prepare the entertainment center
Video of the Day
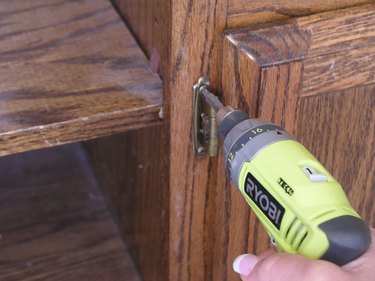
Clean the entertainment center thoroughly and remove all of the hinges, handles, and knobs. Save the hardware for later use. Sand it lightly and wipe off all dust with a tack cloth.
Video of the Day
Although there are many paints on the market that include primer in their formula, it is a good idea to roll on a coat of a single primer to seal the finish and ready the piece for paint. The finish will take a lot of abuse since it will be used as a toy.
2. Paint it a fun color
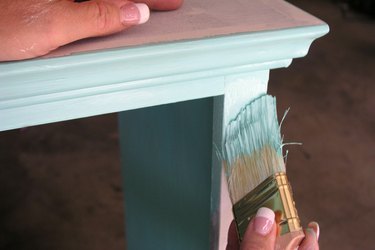
Paint the entertainment center using the color of your choice. The main body can be painted with a roller, but you should use a brush for the trim and small areas to be sure you have good coverage. Paint all of the shelves and doors as well.
Tip
Consider using colors that are appropriate for each area, like white inside the refrigerator and black inside the oven.
3. Create the refrigerator door
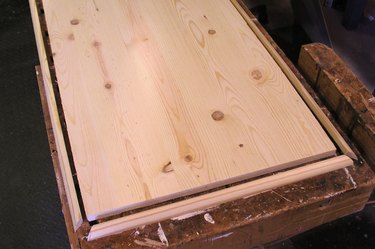
For the refrigerator door, cut a pine panel about 1 inch smaller in each dimension than the size of the original door. Cut pieces of 1 1/4-inch round trim to frame the door. Glue and nail the pieces in place. Fill any cracks or knots with spackle and sand it smooth when dry.
Cut through the panel at about a third of the length to create the freezer door. The bottom two thirds will be the refrigerator door. Paint both pieces in your chosen color.
4. Set the sink
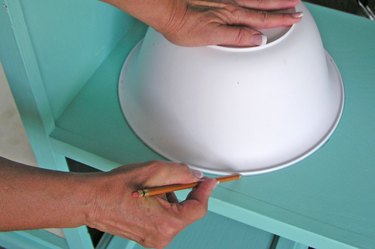
This sink is made from a plastic kitchen bowl, but you could also use a stainless steel bowl. Place the bowl upside down in the cabinet and draw a circle around the rim with a pencil. Draw a second circle about 3/8 inch inside the first circle, which will now be your cut line.
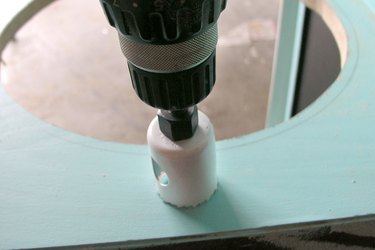
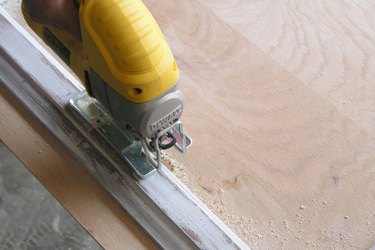
Drill a hole in the cabinet inside the circle to be cut out. Put the blade of a jigsaw inside the hole and cut along the pencil cut line. Sand off any burrs or splinters. The bowl can be permanently mounted with construction adhesive, or you can keep it removable for easier cleaning.
5. Mount the sink faucet
Cut a 1 1/4-inch hole at the center back of the sink location to mount a sink faucet.
Tip
Use a broken faucet or one purchased at a thrift or resale store.
6. Create the back kitchen wall
Cut a piece of masonite or 1/4-inch plywood to fit the back of the cabinet. Glue and nail a wooden picture frame to the center of the space and trim out the center with a jigsaw. This will be the kitchen window. Mount this assembly to the back of the cabinet with small nails.
Tip
Hold the saw level along the top of the frame to get a straight cut.
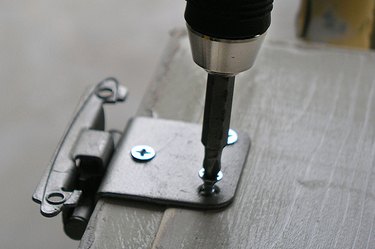
7. Rehang the doors
Clean the hinges and spray paint them if necessary. When rehanging the doors, attach the hinge to the door and then, holding it in place, screw the hinge to the frame. Move the hinges to the bottom edge for the oven door.
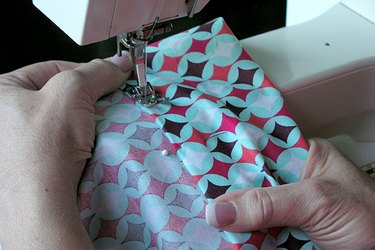
8. Make the curtains
Choose a piece of fabric or a kitchen towel to be the curtains. Hem the sides, bottom, and top with a pocket. Use a dowel rod through the pocket for the curtain rod and hang it on cup hooks mounted to the top corners of the picture frame.
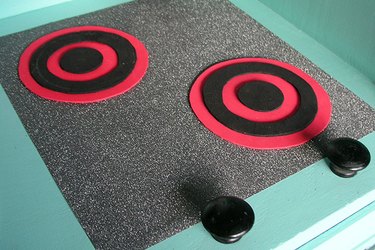
9. Create a stove top
Cut and mount a piece of adhesive-backed vinyl to fit the oven door and then another piece for the stove top. Cut circles from craft foam and glue them together for the stove burners. Mount knobs on washers so that they will turn like real stove handles.
10. Add the finishing touches
Reuse the original handles and knobs or purchase modern ones. Add cup hooks to hang utensils and a chalkboard for grocery lists.